Tuesday, April 30, 2019

Tutorial Tuesday. . . Tea Together Double Z Joy Fold. . . and memories of Nanny Lewis. . .


Whenever I look at this stamp set, and especially the tea cup and saucer, I think of my sweet grandmother.  To me she was always Nanny Lewis.  

I have such fond childhood memories of Nanny Lewis...a tiny little woman with the hugest heart, strongest faith, and kindest soul.  

As a child I always loved to go stay with Nanny...she always made me feel so special.  

And why the teacup reminds me of her, is we had tea parties together, and it was a big deal because I was allowed to drink tea (more milk than tea) in a china cup with her, and nibble on homemade cookies or homemade bread with molasses. It was so much fun! 

Funny how an image of a teacup can bring back such sweet memories from years gone by. 

Ok....so let's get out of memory lane and back to today's card.  

This card was featured in one of my April Technique card classes and it features the Double Z Joy Fold

The designer series paper  is the GORGEOUS Floral Romance Specialty DSP and this one is actually vellum.   

The stamp set is the Tea Together with the coordinating Tea Time Framelit Dies (yes they are carrying over to the new catalog debuting on June 4th.  I love it when Stampin' Up! gives us wonderful products that coordinate!!!

And....seeing as it is Tutorial Tuesday.....here is your bonus step by step free tutorial....enjoy! 

If you would like to make fun cards like this why not join the girls for card class?  Below are upcoming class schedules...contact me to reserve your seat. 


Monday, April 29, 2019

A Happy Tails Two-fer!


What is better than one cute puppy card?  Well two cards of course!  LOL! 

These are cards we made in one of my April Techniques card class....showing how to use the negative space from one punch to create another equally cute card!  Saves you time, saves you money, saves the environment! 

The card bases for both cards were Basic Black.  The mat layers for both cards were Crumb Cake.  Both mats were embossed with the Tufted TIEF.  I used a Stampin Write marker to add some dots to one of the mats.  

Then the dog was punched from a circle of black cardstock.  The negative was used for one card and the positive was used for the other.  A bit of red for accents was all this pair needed.   Fun! 


If you would like to make fun cards like these....check out my class schedule below (or at top of my blog) and contact me to reserve your seat.  


Friday, April 26, 2019

Petal Promenade Beauty . . . and a fun fold!


We made this card in one of my April Technique classes.  
It features the OH SO GORGEOUS Petal Promenade designer series paper which is sadly retiring :(

To jazz up this card I found a fun fold that I had never tried before.This is called an Arrow Fold card. This card was a CASE from Leanne Greff. I changed up the paper and the tag....but the fold is the same as hers.  
Thanks Leanne for the inspiration! 


With just a few easy creative folds you have a fun WOW card.  
The tag die and the greeting are  from the Botanical Bliss Bundle on page 20 of the Annual Catalog.
The card stock colors I used were Blackberry Bliss, Whisper White, Rich Razzleberry and Mossy Meadow.  The ink color is Rich Razzleberry. 

If you would like to join the girls in class, making fun cards like these, check out my class schedule below and contact me to reserve your seat. We would love to have you join us!

Registration deadline for each class is the Saturday prior to the class at noon(this gives me time to design, cut and prep card kits)


Thursday, April 25, 2019

DEAR DOILY- HEAT EMBOSSING WITH INK BLENDING AND WATER SPLATTER


Bermuda Bay and Gorgeous Grape pairing are FABULOUS! 

This is a card we made in one of my April Techniques Card Class.  It features heat embossing, ink blending and water splatter techniques. 

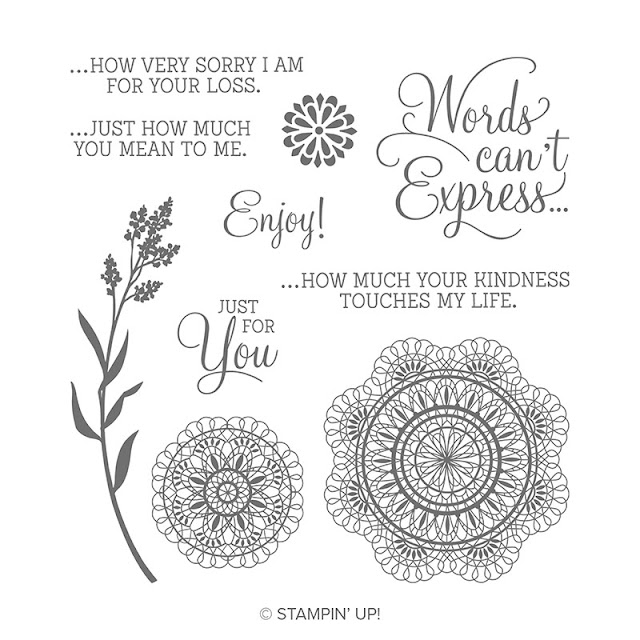
Dear Doily Stamp Set (found on page 47 of the Occasions Catalog) is the star of the show.  

Here is a closeup image of that set:


If you would like to join us for a card class, check out the class schedule below and contact me to reserve your seat!  We would love to have you join us. 

Wednesday, April 24, 2019

What's Up Wednesday. . .

UPCOMING CLASSES:

RESERVE YOUR SEAT EARLY AS SUMMER CLASSES FILL QUICKLY.

REGISTRATION CLOSES: THE SATURDAY BEFORE SCHEDULED CLASS AT NOON
(GIVES ME TIME TO DESIGN AND PREPARE KITS) 


EVERYTHING IS ROSY - MAY 1-31/19


04.01.19_THSHAREABLE_Q2_OOP_ENG


NEW CATALOG ARRIVES JUNE 4th!!!  


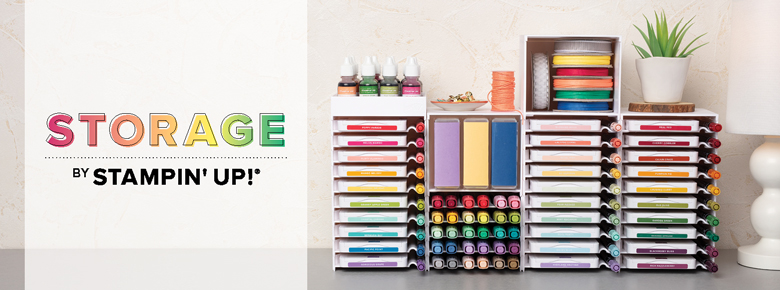
STORAGE BY STAMPIN'UP!

Storage by Stampin' Up!

Find all the details here: https://www.stampinup.com/ecweb/products/21040/storage-by-stampin-up!


LAST CHANCE PRODUCTS: 

Last-Chance Products

Find all the details here: https://www.stampinup.com/ecweb/category/200500/last-chance-products


CLEARANCE RACK SAVE UP TO 60%:

THE CLEARANCE RACK HAS JUST BEEN UPDATED......
Clearance Rack


Find all the details here: https://www.stampinup.com/ecweb/products/200100/clearance-rack

Tuesday, April 23, 2019

Tip Tuesday.....How To Get More From Your Stamps.....think LAYERS...

I like to give quick demos prior to starting my class.  During this time, I like to give my girls tips and ideas they can try at home.  During my last class, my demo was on how to get more from your stamps: 


I made this sample card using the Buffalo Check background stamp.  I showed the girls that this background stamp can be used in many ways.....stamped on its own.....or colored with Stampin Blends


Or stamp it in one color, then add another layer of color using the sponge brayer:


Other ways are to:
  •  color with Stampin' Write Markers, 
  • drag strips of color using the ink pad or ink spot drag method, 
  • spritz a secondary color over top, use watercolor pencils, or 
  • Brusho pigment powders.  
The possibilities are endless.....just think layers.....see what you can come up with! 
.  

Monday, April 22, 2019

CRAFTING FOREVER. . . WE ARE CUT OUT TO BE FRIENDS. . .


This is one of the cards we made during my April 4 Techniques Card Class.  
It features the Faux Stitching Technique as well as Background Stripes Technique. 


The colors are Lemon Lime Twist , Bermuda Bay, Daffodil Delight along with Whisper White and Basic Black.

The stamp set is Crafting Forever found on page 179 of the Annual Catalog. 

T

The background lines were drawn freehand to give a purposeful slightly crooked and offset look.  I used a Stampin Blend marker to do this. 

Next the designer series paper was adhered offset to add interest and depth. 

The scissors were stamped with Memento Black ink and colored with Stampin Blends.  

Then I used a ruler and a journalling pen to add faux stitch detail around the perimeter of the focal image. 

A quick stamped greeting highlighted by a scribble from a Stampin Blend marker and some freehand faux stitching and some scraps of coordinating ribbon and voila! 

The idea for this card came from the quarterly demonstrator Stampin' Success magazine, a magazine giving demonstrators ideas for presenting products to their customers.....here are the cards from the magazine based on skill level: 

Beginner Crafter: 

Casual Crafter: 


Avid Crafter: 


and once again....my card stepped up yet again because crafting is fun and my girls rock!


Thursday, April 18, 2019

Hey Canada...Save The Date...May 15


Just think about the amount of blood that would be donated if every demonstrator and two of their customers donated.

  What a wonderful gift!  

I challenge all of my readers to join in on this!

Wednesday, April 17, 2019

Heat Embossing and Ink Blending Technique Featuring Winter Woods....


Today's card features the Winter Woods stamp set found on page 55 of the Occasions Catalog.  Also used the wood slice image from the Rooted In Nature bundle found on page 143 of the Annual Catalog. 

Here are close up looks at the stamp sets: 


And here is a closeup look at the detail in that wood slice stamp: 


I stamped the trees in Versamark ink and heat embossed with black embossing powder.  Next I grabbed a sponge and got busy with some ink blending. 

I stamped the wood slice and fussy cut it since there was no coordinating die.  Then I stamped a greeting in Versamark and heat embossed it as well. 

A bit of ribbon and a few dimensionals for the greeting and this card was done in a jiffy!