Tuesday, December 26, 2023
Saturday, December 23, 2023
Merry Christmas and Happy Holidays
Merry Christmas!

I want to take a moment, and pause all the rush and preparations for a minute to wish each of you a very Merry Christmas and a Happy New Year!
I want to take a moment to tell you, that I appreciate all of you who subscribe, view, and comment on this blog.
Your participation keeps me motivated to continue to share my cards on this blog each day.
Being a small fish in a big pond can be overwhelming at times.
Your comments, questions, and orders feed my desire to keep on. So thank you!
I hope you have a fabulous holiday season and are blessed with the gift of family and friends.
Thursday, December 21, 2023
Stamp With Shel Thursday- Submarine Life Trio
Good Morning Stampers!
Today I am sharing the cards we made during last night's Stamp Therapy With Shel on Facebook Live.
Here is the link to the video replay:
CLICK HERE FOR VIDEO REPLAY ON YOUTUBE
And here are my cards:
Finally, for this third card, I made a fun fold I have never seen before. It is super easy to make and I can see using this fold for a variety of cards....it showcases DSP beautifully.
Card Measurements:
Card One: Orange Blimp
Base: Basic White 4 1/4 x 8 1/2 score 4 1/4 Mat: Blueberry Bushel 4 1/8 x 4 1/8 DSP: 4x4 Basic White 4 1/4 x 5 1/2 for stamping and punching Card Two: Yellow Submarine
Base: Basic White 4 1/4 x 8 1/2 score 4 1/4 DSP: 4 x 4 Strips: Daffodil Delight 4@ 1/4 x 4 Basic White 4 1/4 x 5 1/2 for stamping and punching Card Three: Fun Fold
Card Base 1: Basic White: 5 1/2 x 5 1/2 score 1 1/4- mark down 1 3/4 from top- trim to score line Card Base 2: Basic White: 5 1/2 x 3 3/4 score 1 1/4- mark down 1 3/4 from top- trim to score line Card Base 3: Basic White: 4 1/4 x 2 score 1 1/4 DSP for Base 1: 4 1/8 x 5 3/8 DSP for Base 2: 4 x 4 DSP for Base 3: 3 3/8 x 1 7/8 Basic White 4 x 5 1/2 for stamping and punching Message Panel for inside: Basic White: 4 1/4 x 2 3/4
Wednesday, December 20, 2023
Stamp With Shel Wednesday- Night Angels Global Video Hop- Stippled Roses Birthday...
Today it is Night Angels Global Video hop! Our challenge today is a birthday card. Here is the link to my video:
The links to the other videos are in the video description. Please check them out.
Tuesday, December 19, 2023
Stamp With Shel Tuesday- Merriest Trees Bundle- Step It Up with Stampin' Up!
| Casual, Avid, or Artuflly Avid... Step It Up or Not...the choice is yours! |
| This holiday season, don’t just trim your Christmas tree—trim some festive paper to make beautiful handmade cards for your loved ones. Use the Merriest Trees Bundle to keep your card simple, or step it up to make something really special! CASUAL To make this card, stamp a Christmas tree image in Soft Sea Foam and Mossy Meadow ink on Basic White Cardstock. Then die cut a Christmas tree shape from Basic White cardstock and adhere it over the stamped tree. Next, layer those over the Night of Navy card base and add a stamped sentiment with a few Adhesive-Backed Sparkle Gems. AVID To step up this card, add a panel of Holographic Trio Specialty Paper and a strip of O Holy Night Designer Series Paper. Also, add a die-cut star topper and some die-cut tree trimmings. To finish, die-cut a tree trunk and back it with Pecan Pie cardstock. ARTFULLY AVID For this last project, splatter some ink onto the card front using Water Painters. Next, use a Blending Brush to blend Night of Navy and Misty Moonlight into our top panel. Next, die-cut the tree so that it could be assembled in separate pieces. To finish, decorate the tree with die-cut ornaments and wrap a Silver and White Sheer Ribbon around the whole project. |
Monday, December 18, 2023
Stamp With Shel Monday- DSP Showcase Cards & Sneak Peeks!
- Fold the card base on the score line.
- Add DSP to the front flap and inside the front flap as shown in the video.
- Add scrap DSP to the greeting panel.
- Add the greeting panel to the mat layer then add it to the inside of the card as shown in the video.
- Stamp the greeting in Memento Black ink and punch it out.
- Punch out a layering background punch for the greeting tag
- Add the greeting to the card front using Dimensionals
- Embellish with ribbon or twine and dots of your choice
I would love to be your Stampin’ Up!
Demonstrator!
If you live in Canada and do not have a
demonstrator, I would love to be yours!
Contact me
anytime:
Email: andersonshel@gmail.com
Phone: (204) 232-7744
Join My
Team:
https://www.stampinup.ca/join/?demoid=2152727&viatoken=true
Where to
Find Me:
Blog: www.shelscreativecorner.blogspot.com
YouTube: https://www.youtube.com/@STAMPWITHSHEL
Facebook: https://www.facebook.com/StampWithShel
Instagram: https://www.instagram.com/stampwithshel/
Pinterest: https://www.pinterest.ca/StampWithShel/
Join Me:
Blog Posts: weekdays- project with tutorial
Facebook Posts: daily project with link to blog post and tutorial
Instagram Posts: daily project with link to blog post and tutorial
Facebook Live Video
Tutorials: Sunday & Wednesday - replays on YouTube
Sunday, December 17, 2023
Friday, December 15, 2023
Stamp With Shel Friday- Sneak Peek- Stippled Roses Bundle -Fun Fold With Tutorial & Weekend Challenge
Good Morning Stampers!
This morning I have a GORGEOUS card to share with you, which is another SNEAK PEEK from the 2024 Spring Mini Catalog that starts on January 4th.
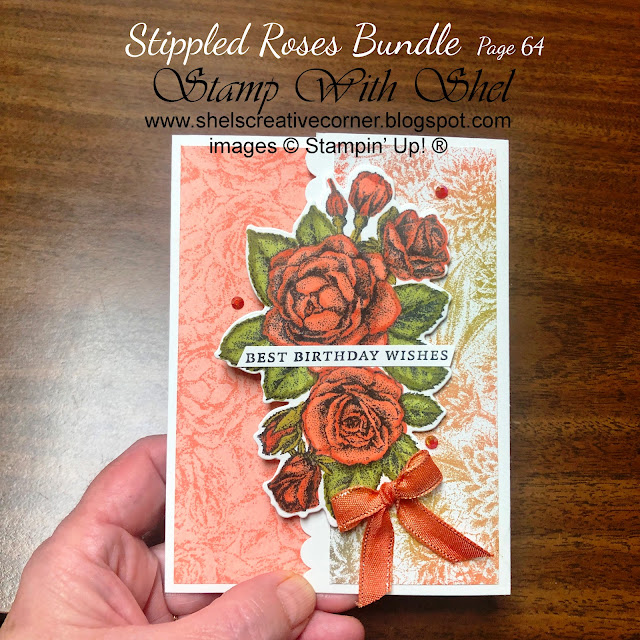
Here is my card:
I am telling you....this bundle is the best!Softly Stippled is a detailed stamp that adds a ton of dimension to the image before you even color it. Seriously, I just slapped some color on here, and look how beautiful it is! And the coordinating dies are perfect!
The Softly Stippled 12x12 DSP ( a Sale-A-Bration FREEBIE!) is beautiful and coordinates perfectly!
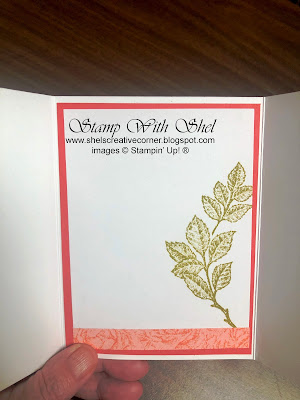
Here is a look at the inside of my card:
Measurements:
- Fold the card base on the score lines- both scores fold towards the center.
- If you wish to have a fancy edge use a die or punch to create it now. (I used a retired scallop border punch)
- Stamp the leaf image in Old Olive ink on the inside greeting panel ( I also added a 1/2"x 3 3/4 strip of leftover DSP)
- Add the greeting panel to the Calypso Coral mat layer, then add to the inside of the card
- Add the DSP to the front panels.
- Color yellow ribbon with Calypso Coral Stampin Blends and set aside to dry
- Stamp the floral image using Memento Black ink and color with Stampin Blends.
- Die cut the floral image and add to the front panel (MAKE SURE to only put dimensional to one side or you will glue your card shut)
- Stamp greeting on scrap Basic White and angle the ends. Attach to the flowers.
- Make a bow and attach it to the card front with glue dots
- Embellish with the Calypso Coral gems.
Weekend Challenge: Use your stash....create a card using Stampin' Up! products and send me a photo.
Thursday, December 14, 2023
Stamp With Shel Thursday- Sneak Peeks....
Good Morning Stampers!
Today I wanted to share with you the two cards we made last night during Wednesday Night Stamp Therapy With Shel.
Here is the link to the video replay if you wish to see the unboxing of new products and the making of the cards:
These two cards feature sneak peeks from the new Mini Catalog and Sale-A-Bration brochure coming on January 4th.
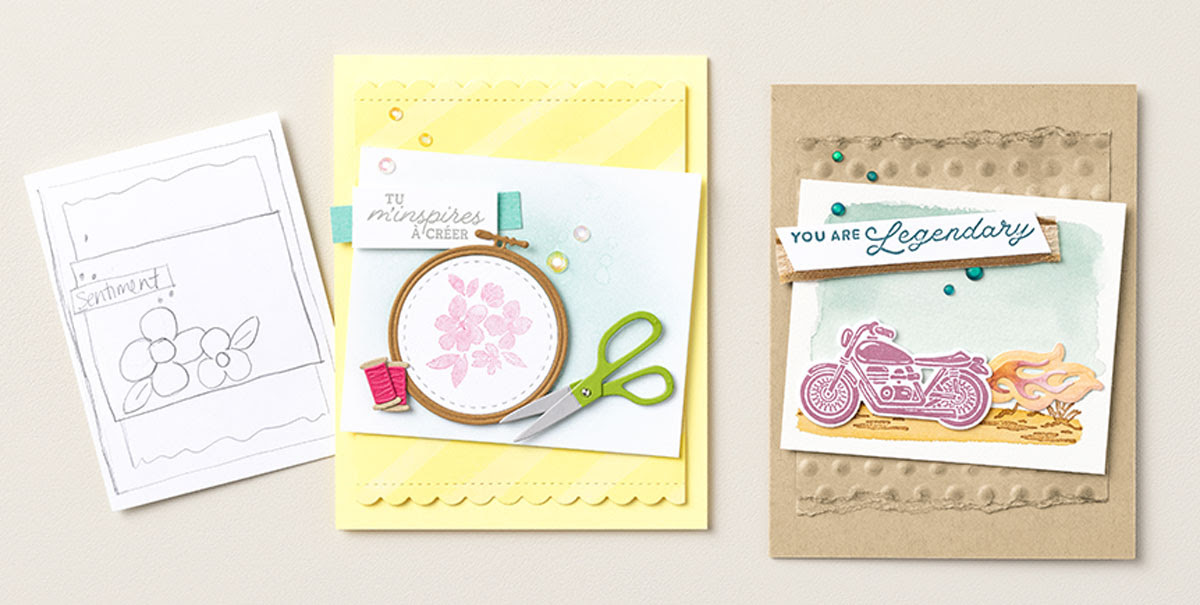
Since I was doing an unboxing showing the new products that I received, I wanted to keep my cards simple. Here is the inspiration sketch I followed for my cards:
Here are my cards:
My second card features the Thoughtful Expression Bundle found on page 62. The DSP is from the Softly Stippled 12x12 (a Sale-A-Bration freebie). The ribbon is Pool Party Crinkled Ribbon (a Sale-A-Bration freebie)
For this card, I added an extra layer of Basic Black to give that pop of contrast. I used DSP instead of cardstock, but I still embossed it for the texture. The images were also popped up with Dimensionals. Simple but so pretty!
I hope you can join me next Wednesday evening at 7 pm (December 20th) on my Stamp With Shel Facebook page for Stamp Therapy With Shel and more sneak peeks!
Tuesday, December 12, 2023
Stamp With Shel Tuesday: December Challenge
Here is a sure way to chase away the cold weather blues!
Check out this bright and cheerful beauty with a combination of bright card stock and soft florals and tons of texture and dimension:
 |
| Creative Challenge for December |
| Are you up for December’s Creative Challenge? This month, we’re focusing on different ways to use our gorgeously upbeat and versatile Delightfully Eclectic Designer Series Paper—which features tons of cute patterns you can use for just about any occasion! You’ll get stripes, flowers, notebook paper, dots, and more—and there’s a lot of it! There are 48 sheets of patterned paper, four each of 12 double-sided designs! How You Can Make It: Start with a Berry Burst Cardstock base 8 1/2 x 5 1/2 scored at 4 1/4. Next, add a pop-up layer Berry Burst 3 3/4 x 5(embossed with the Basics 3D Embossing Folders dots pattern) and add to the card front with Dimensionals. Next, choose one of the bold, floral designs from the Delightfully Eclectic Designer Series Paper and add colour to the flower centres using Stampin’ Blends (Calypso Coral, Daffodil Delight, Flirty Flamingo, Fresh Freesia, and Petal Pink). Next, fussy cut the florals to use as the stand-out centrepiece. Tip: Use the brush tip of the marker, to create soft lines radiating from the centre. Next, add the flower elements to the card front with Dimensionals. The sentiment is cut from Basic Black and Basic White Cardstock using the Wanted to Say Dies. Add it to the card front using Stampin’ Dimensionals. For a sparkling finishing touch add sequins from the Adhesive-Backed Sequins Trio coloured with Berry Burst Stampin’ Blends. |
Monday, December 11, 2023
Stamp With Shel Monday- Shel's Spotlight- Carole Anderson & Radiant Light....
Here's how you can make it:
Supplies:
10. Embellish with dots
A big thanks to Carole for sharing her work and inspiring others!
Sunday, December 10, 2023
Friday, December 1, 2023
Stamp With Shel Friday- Snow Crystal Fun Fold...
Hey Hey Hey Stampers! It's Friday! Yay!
This is my last creative post for the week. And I may just have saved the best for last...
Today's card features the Snow Crystal stamp set. I borrowed a greeting from the Sparkling Snowflakes stamp set as well.
Here is my fun fold:
It is a gatefold (of sorts) and it is super easy to make!
Here is a peek at the opened card:
Here is the link to my video tutorial:
How You Can Make It:
Supplies:
Measurements:
Card Base: Poppy Parade: 6 x 5 1/2 score 4 1/4
Inside Mat: Balmy Blue: 4 x 5 1/4
Inside Greeting Panel: Basic White: 3 3/4 x 5
Front DSP: 1 5/8 x 5 3/8
Deckled Circle: Basic White: cut with second largest die- score at 4 1/8
Tag Mat: Silver Foil: 2 1/4 x 1
Tag: Basic White: 2 1/8 x 7/8
Instructions:
- Fold the card base on the score line and burnish it flat with a bone folder.
- Add the Balmy Blue mat to the inside panel making sure it is centered.
- Die cut and score the circle.
- Rub the embossing buddy over the card stock to remove oils and static
- Stamp the snowflake image using Versamark ink
- Cover with clear embossing powder and heat set.
- Use a blending brush to add Balmy Blue ink to the snowflake as desired. I did a light wash all over with darker ink in the center of the snowflake.
- Use a paper towel to wipe the surface to remove any ink that was on the snowflake.
- Fold the snowflake on the score line and add to the BACK of the inside Basic White greeting panel making sure it is centered.
- Add the Basic White panel to the inside of the card making sure it is centered
- Add the DSP to the left panel of the card
- Stamp the greeting on the Basic White tag using Memento Black ink
- Add the tag to the tag mat and attach to the center of the snowflake using dimensionals
- Embellish with the Glittered Sequins.
I would love to be your Stampin’ Up! Demonstrator!
If you live in Canada and do not have a demonstrator, I would love to be yours!
Contact me
anytime:
Email: andersonshel@gmail.com
Phone: (204) 232-7744
Join My
Team:
https://www.stampinup.ca/join/?demoid=2152727&viatoken=true
Where to
Find Me:
Blog: www.shelscreativecorner.blogspot.com
YouTube: https://www.youtube.com/@STAMPWITHSHEL
Facebook: https://www.facebook.com/StampWithShel
Instagram: https://www.instagram.com/stampwithshel/
Pinterest: https://www.pinterest.ca/StampWithShel/
Join Me:
Blog Posts: weekdays- project with tutorial
Facebook Posts: daily project with link to blog post
Instagram Posts: daily project with link to blog post
Video Tutorials: Monday, Wednesday, and Friday


.jpg)



.png)


.png)


