Happy Wednesday! Welcome to the Around the World on Wednesday Blog Hop!
We are a group of Stampin' Up! demonstrators from across the globe who get together monthly for a blog hop. We showcase Stampin' Up! products and hope that our projects inspire you to get stamping!😉
Our challenge this month was to "Let's Go On An Adventure". That was all the info we had and we had the creative freedom to go wherever with our ideas.
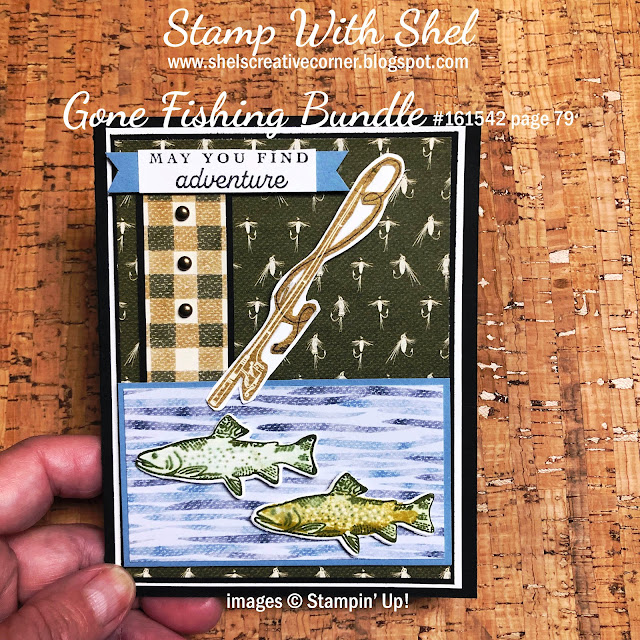
Since I was at the trailer and had limited supplies, I opted to go on a fishing adventure with the Gone Fishing Bundle. The greeting is from the Fun on Wheels Bundle.
I purchased this bundle because it reminded me of years gone by, and the sweet times when I would take my young sons fishing on the local brooks and river.
Honestly, I treasured the one-on-one time spent with them in the quiet beauty of the surrounding nature, away from the hustle and bustle of everyday life.
Their sheer joy when they caught a tiny trout was amazing...still makes me smile to think of it.....(and a bit teary as they are grown men with families of their own now)
Ok enough of my blabbering on ....here is my card:
How You Can Make It:
Supplies:
Gone Fishing Bundle
Rustic Metallic Dots
Basic Black cardstock
Basic White cardstock
Boho Blue cardstock
Let's Go Fishing DSP
Memento Black Ink
Mossy Meadow Ink
Wild Wheat Ink
Blender Pen
Wink of Stella
Paper Snips
Tombow
Dimensionals
Paper Trimmer
SCEM Machine
Measurements:
Card Base: Basic Black: 8 1/2 x 5 1/2 score 4 1/4
Inside Layer: Basic White: 4 x 5 1/4
Mat Layer 1: Basic White: 4 x 5 1/4
Mat Layer 2: Basic Black: 3 7/8 x 5 1/8
DSP Layer 1: Fly print DSP: 3 3/4 x 5
Mat Layer 2: Basic Black: 1 1/8 x 4 3/8
DSP Layer 2: Gingham DSP: 1 x 4 1/4
Mat Layer 3: Boho Blue: 3 3/4 x 2 1/8
DSP Layer 3: Water print DSP:3 3/8 x 2
Stamping: Basic White: 4 x 5 1/4
TagMat Layer 4: Boho Blue: 1/2 x 3
Instructions:
- Fold the card base on the score line and burnish it flat using a bone folder.
- Add the white liner to the inside of the card using Tombow.
- Add the white mat layer 1 to the outside of the card using Tombow.
- Add the black mat layer 2 to the outside of the card using Tombow.
- Add the DSP layer 1 to the outside of the card using Tombow.
- Add the DSP layer 2 to the black mat layer 2 using Tombow, then attach it to the card front.
- Add the DSP layer 3 to the blue mat layer 3 using Tombow, then add the card front using Dimensionals on one side and Tombow on the other.
- Stamp the greeting and two fish. Die cut the fish and trim the greeting to size.
- Add Wink of Stella to the fish and add dimensionals to the back. Add to the card front
- Fussy-cut the fishing rod and glue it onto white card stock and fussy-cut again. Add to the card front as an embellishment
- Add three rustic metallic dots to the gingham DSP.
- Flag ends of blue mat layer 3 and add behind the greeting.
- Attach greeting to the card front with dimensionals

Now hop along and see what my creative friends have to share with you today:
In case you get lost here is a list of participant links:


Nice guy card!
ReplyDeleteBeautiful masculine card. Love the way you have combined the different patterns in this card design.
ReplyDelete